How to automatically publish the HTML of my contribution to a website?
TL;DR
After cloning the right template for you (R, Python, or both), verify the .github/workflows/build.yml, it should contain exactly what is on the Computo Workflow repository’s build.yml :
name: Main Workflows

on:
  push:
    branches: ["main","master"]
  repository_dispatch:
    types: [custom-event]
  workflow_dispatch:
  pull_request:
    branches: ["main","master"]


jobs:
  call_env_workflow:
    uses: computorg/workflows/.github/workflows/global-env.yml@main
  call_quartopublish_workflow:
    permissions:
      id-token: write
      contents: write
      pages: write
    uses: computorg/workflows/.github/workflows/publish-render.yml@main
    needs: call_env_workflow
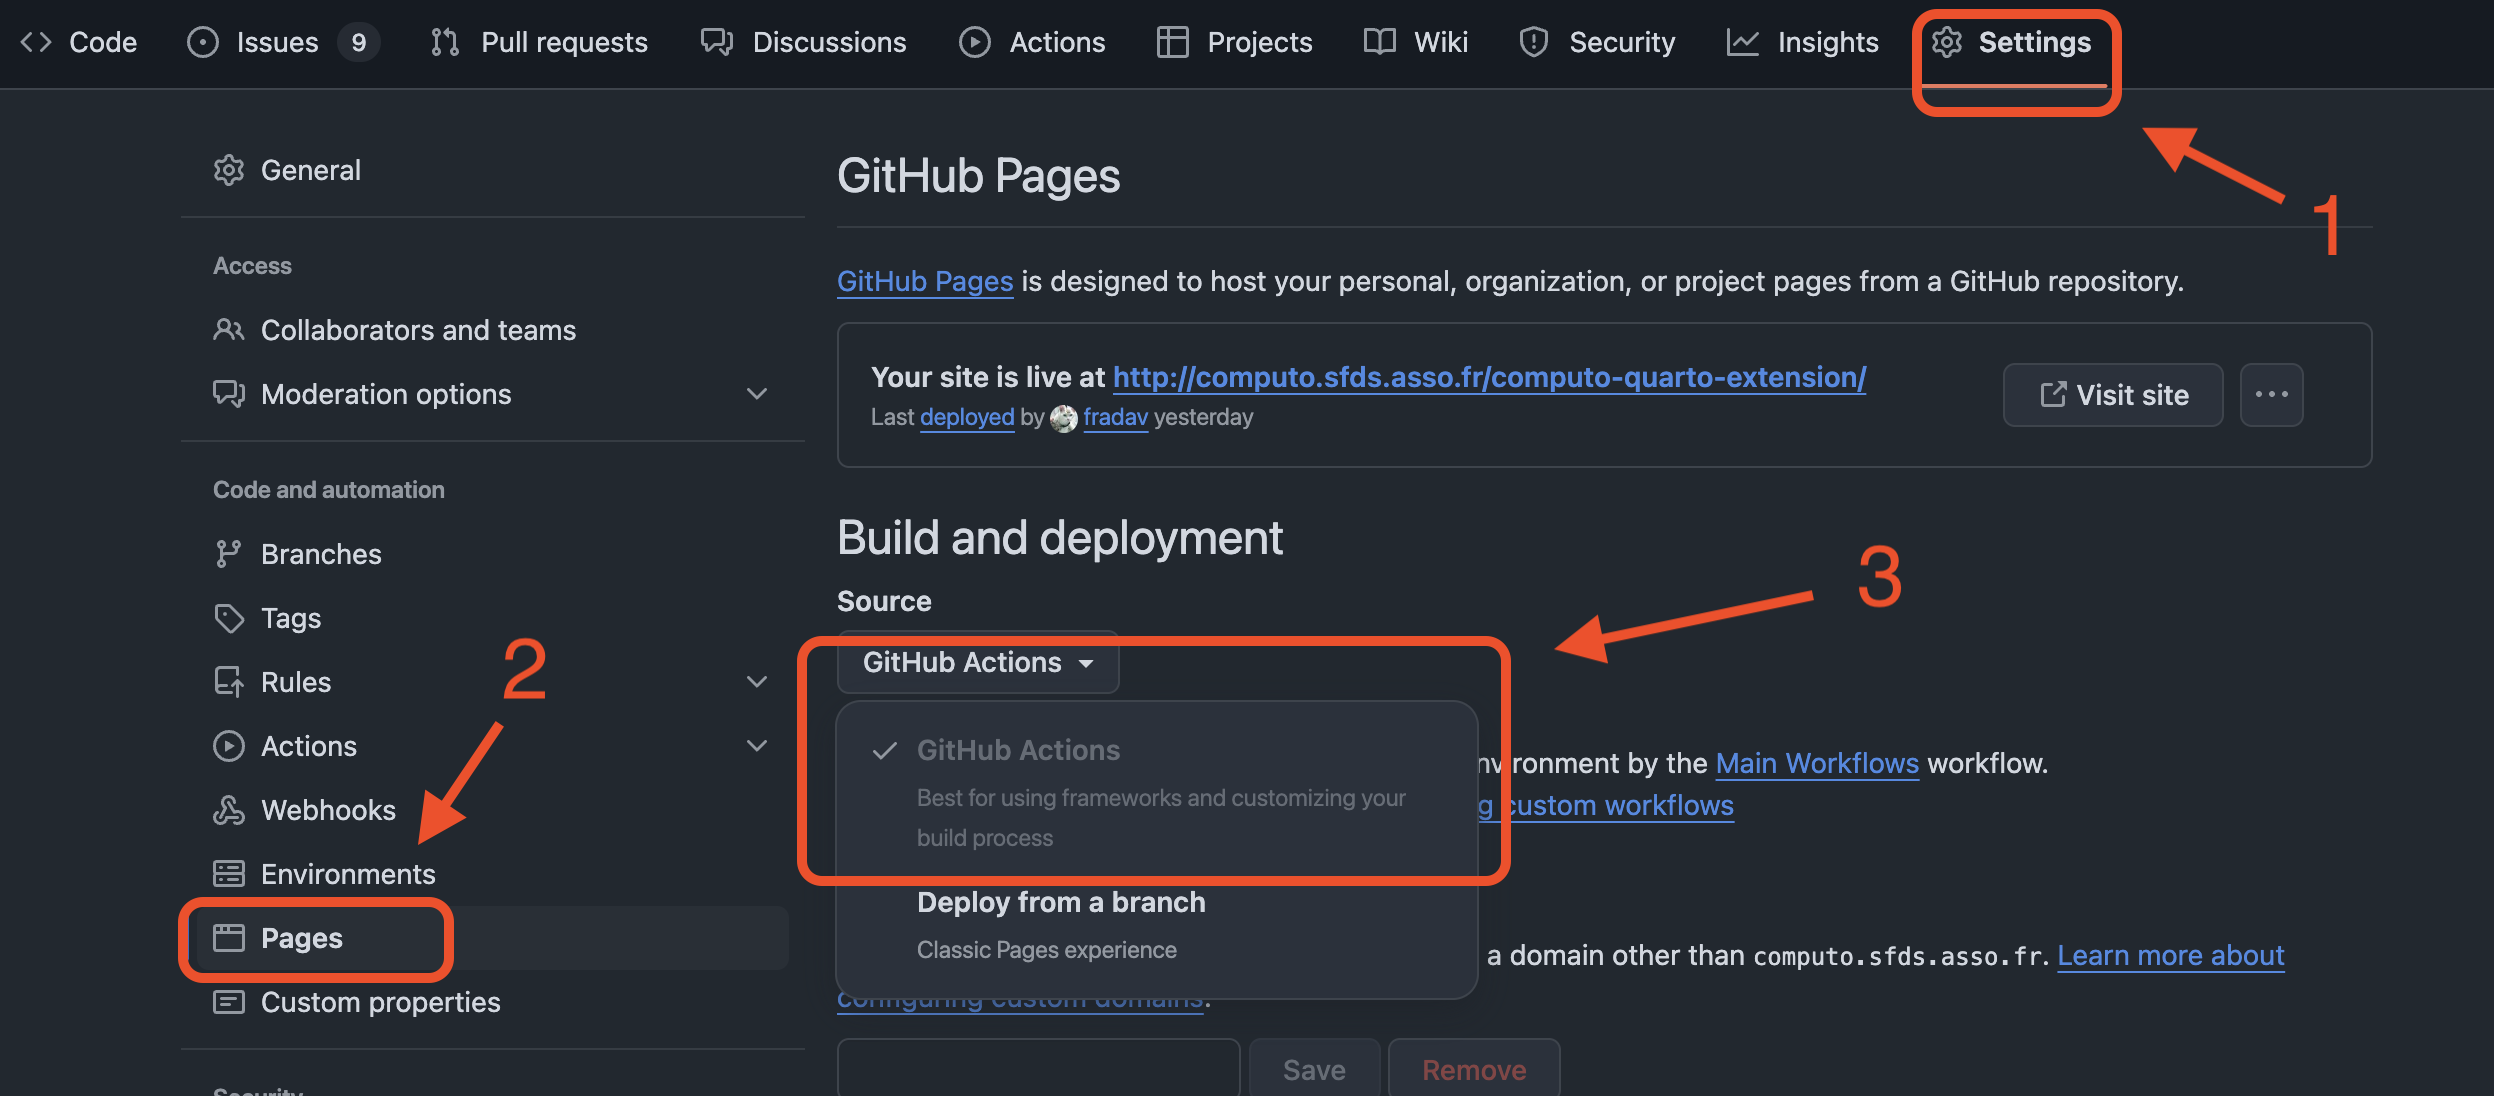
Second, in your Settings > Pages on your repository, select the GitHub Actions as the source of your website.
Then, you can customize the setup-env-ci.sh and setup-render-ci.sh scripts to fit your needs.
-
setup-env-ci.shis for setting up the environment and typically adding system dependencies. The virtual machine on github (runner) may need to install some packages withapt-getfor R or Python packages. -
setup-render-ci.shis for taking care of specific dependencies outside of quarto, related to rendering, like plotting software or running a script to generate data.
Note
You can safely delete the
gh-pagesbranch if you have one, as we don’t need anymore to push the HTML files to the site.
Computo Workflow Structure
The Computo workflows provide a streamlined publishing pipeline for authors to submit and render Quarto articles directly on GitHub Pages without requiring technical expertise.
Workflow Summary

The publication process consists of two main phases:
- Environment Setup and Caching (
global-env.yml)- Detects and installs required dependencies (Python, R)
- Caches the environment for faster subsequent runs
- Customizable via
setup-env-ci.sh
- Rendering and Deployment (
publish-render.yml)- Renders Quarto documents to HTML
- Publish the output to GitHub Pages
- Customizable via
setup-render-ci.sh
Authors only need to reference the main workflow file (build.yml) in their repository, which orchestrates these processes.
Workflow Visualization
Key Benefits
- Simplified Process: Authors need minimal GitHub Actions knowledge
- Optimized Performance: Environment caching for faster builds
- Customization Points: Two script entry points for custom configurations
- Automated Deployment: Direct publishing to GitHub Pages
Authors simply use the build.yml workflow in their repository to trigger the complete process from environment setup to final publication.